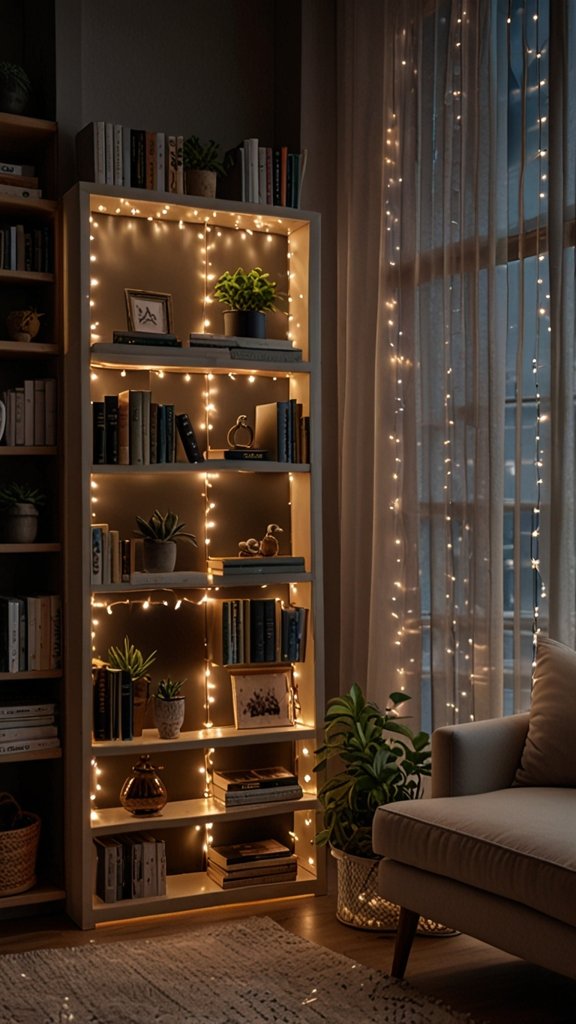

On a warm summer evening in 2024, John’s backyard was buzzing with excitement. He’s hosting his annual neighborhood barbecue, and everything seems perfect – the grill is sizzling, the drinks are flowing, and the conversation is lively. As the sun begins to set, John reaches for the switch to illuminate his newly installed solar string lights, ready to transform his patio into a magical wonderland.
But instead of a soft, enchanting glow, John’s guests are met with… darkness. His solar string lights refuse to cooperate, leaving the party in an awkward twilight. As John fumbles with connections and frantically checks the solar panel, he can’t help but think how easily this disaster could have been prevented with a little know-how and maintenance.
Don’t let John’s lighting letdown happen to you! In this guide, I will teach you the Easy Solar String Lights Troubleshooting Tips. Whether you’re dealing with battery woes, connection troubles, or sensor snags, we’ve got you covered.
But first, let’s tackle some frequently asked questions about solar string light troubleshooting:
FAQs
- Why won’t my solar string lights turn on?
There could be several reasons, including a drained battery, dirty solar panel, or faulty connections. We’ll cover all these issues in detail below. - How long do solar string lights typically last?
With proper care, solar string lights can last 2-3 years or more. However, batteries may need replacement after 1-2 years of regular use. - Can I replace individual bulbs in my solar string lights?
It depends on the model. Some allow for individual LED bulb replacement, while others require replacing the entire string if one bulb fails. - Do solar lights work in winter?
Yes, but their performance may be reduced due to shorter days and less intense sunlight. Proper positioning and maintenance are crucial during winter months. - How can I make my solar string lights brighter?
Ensure the solar panel is clean and positioned for maximum sun exposure. Also, check for any obstructions around individual bulbs.
Now, let’s dive into the Easy Solar String Lights Troubleshooting Tips!
What are the Easy Solar String Lights Troubleshooting Tips?
Before we jump into specific troubleshooting tips, it’s essential to understand how solar string lights work. These eco-friendly lighting solutions consist of several key components:
- Solar panel
- Rechargeable battery
- LED bulbs
- Light sensor or controller
- Wiring and connections
Solar string lights harness the power of the sun through their solar panel, which converts sunlight into electricity. This energy is stored in a rechargeable battery, which powers the LED bulbs when it gets dark. A light sensor or controller manages the on/off functionality, ensuring your lights illuminate automatically at dusk.
Common reasons for malfunctions include:
- Insufficient sunlight exposure
- Battery degradation
- Loose or damaged connections
- Faulty LED bulbs
- Sensor or controller issues
Understanding these basics will help you diagnose and fix problems more effectively. Now, let’s explore some specific troubleshooting techniques!
1. Check the Solar Panel: Your Light’s Energy Source

The solar panel is the heart of your lighting system. If it’s not functioning correctly, your lights won’t have the energy they need to shine bright. Here’s how to ensure your solar panel is in top shape:
Proper placement for maximum sunlight exposure
- Position the solar panel in a spot that receives direct sunlight for at least 6-8 hours daily.
- Avoid shaded areas or locations obstructed by trees, buildings, or other structures.
- Consider adjusting the panel’s angle seasonally to optimize sun exposure.
Cleaning the solar panel surface
- Regularly wipe the panel with a soft, damp cloth to remove dust, dirt, and debris.
- For stubborn grime, use a mild soap solution, but avoid abrasive cleaners.
- In areas with frequent bird activity, clean more often to prevent droppings from blocking sunlight.
Inspecting for physical damage or obstructions
- Check for cracks, chips, or other damage to the solar panel’s surface.
- Remove any leaves, twigs, or other debris that might have accumulated on the panel.
- If you live in an area with heavy snowfall, gently clear snow off the panel during winter months.
Pro tip: Use a multimeter to test your solar panel’s output voltage on a sunny day. This can help you determine if the panel is functioning correctly or needs replacement.
2. Battery Woes: Power Storage Problems
The battery is where your lights store energy for those magical night-time displays. If your battery is failing, your lights won’t shine as bright or as long as they should. Here’s how to tackle battery issues:
Signs of a failing battery
- Lights dim quickly after turning on
- Shortened operating time, especially after a full day of charging
- Inconsistent performance from night to night
How to test the battery
- Remove the battery from the solar light unit.
- Use a multimeter set to DC voltage.
- Test the battery – a healthy rechargeable battery should read between 1.2V to 1.5V.
- If the reading is significantly lower, it’s time for a replacement.
Replacing batteries in solar string lights
- Locate the battery compartment (usually near the solar panel).
- Remove the old battery, noting its size and type (often AA or AAA rechargeable).
- Insert a new rechargeable battery of the same size and type.
- Ensure proper polarity when inserting the new battery.
Remember: Always use rechargeable batteries designed for solar lights. Regular alkaline batteries won’t work effectively in this application. For more tips check out my post on how to Extend the Battery Life of Your Solar String Lights
3. Connection Issues: When Lights Go Dark
Sometimes, the problem isn’t with the solar panel or battery, but with the connections between components. Here’s how to address connection problems:
Examining wire connections
- Carefully inspect all visible wiring for signs of wear, fraying, or damage.
- Gently tug on connections to ensure they’re secure.
- Look for any exposed wires that might be causing short circuits.
Fixing loose or corroded connections
- Tighten any loose connections you find.
- If you spot corrosion (often appearing as a green or white crusty substance), clean it off with a mixture of baking soda and water.
- For stubborn corrosion, use a small wire brush, being careful not to damage the underlying metal.
Dealing with water damage to connectors
- If you suspect water damage, carefully dry out the affected areas.
- Use a hair dryer on its lowest setting to remove moisture from hard-to-reach spots.
- Consider applying a waterproof sealant to connections to prevent future water ingress.
Pro tip: A bit of dielectric grease applied to connections can help prevent corrosion and improve conductivity.
4. LED Bulb Troubles: Dimming and Flickering
LED bulbs are known for their longevity, but they’re not immortal. Here’s how to address common LED issues:
Identifying faulty LED bulbs
- Look for bulbs that are significantly dimmer than others in the string.
- Watch for flickering or inconsistent lighting.
- Check for any visibly damaged or discolored bulbs.
Cleaning dirty or obstructed bulbs
- Gently wipe each bulb with a soft, dry cloth to remove dust and debris.
- For tougher dirt, use a slightly damp cloth, being careful not to let moisture enter the bulb housing.
- Ensure there are no obstructions around the bulbs, such as leaves or spider webs.
Replacing individual LED lights
- Check if your model allows for individual bulb replacement.
- If so, carefully remove the faulty bulb and replace it with a new one of the same type and wattage.
- For non-replaceable models, you may need to replace the entire string if too many bulbs fail.
Remember: LED color changing problems can often be resolved by resetting the controller or checking for loose connections.
5. Switch and Sensor Snags: Activation Problems
The automatic on/off functionality of solar lights is part of their charm, but it can also be a source of frustration when it’s not working correctly. Here’s how to troubleshoot:
Testing the on/off switch functionality
- Locate the manual on/off switch (usually near the solar panel or battery compartment).
- Toggle the switch to ensure it moves freely and makes a distinct “click” when engaged.
- If the switch feels loose or doesn’t click, it may need replacement.
Adjusting light sensors for proper activation
- Clean the light sensor with a soft, dry cloth to remove any dirt or debris.
- Ensure the sensor isn’t obstructed by leaves, spider webs, or other materials.
- Test the lights by covering the sensor to simulate darkness – they should turn on within a few seconds.
Troubleshooting motion sensors (if applicable)
- Check the sensitivity settings of your motion sensor and adjust if necessary.
- Ensure the sensor’s “eye” is clean and unobstructed.
- Test the sensor by walking in front of it at various distances to gauge its responsiveness.
Pro tip: If your lights are activating too early or too late, you may need to recalibrate the dusk-to-dawn sensor. Consult your product manual for specific instructions.
6. Weather Woes: Protecting Your Lights from the Elements
Outdoor lighting faces constant exposure to the elements. Here’s how to keep your solar string lights shining bright, rain or shine:
Waterproofing techniques for outdoor use
- Check that all connection points are properly sealed.
- Apply silicone sealant to any areas where water might penetrate.
- Consider using waterproof tape around joints and connections for added protection.
Winter care and storage tips
- If possible, bring your solar lights indoors during harsh winter weather.
- If leaving them outside, ensure snow doesn’t accumulate on the solar panel.
- Consider using a weatherproof cover for the solar panel when not in use.
Heat-related issues and how to prevent them
- In extremely hot climates, provide shade for the battery compartment to prevent overheating.
- Ensure adequate ventilation around the solar panel and battery housing.
- If possible, position lights away from reflective surfaces that might intensify heat.
Remember: Proper outdoor lighting maintenance includes regular checks for weather-related damage, especially after storms or extreme temperature changes.
7. Maximizing Performance: Optimal Settings and Placement
Getting the most out of your solar string lights isn’t just about troubleshooting – it’s also about optimization. Here are some tips to enhance your lighting experience:
Ideal locations for solar panels
- South-facing positions typically receive the most sunlight in the Northern Hemisphere.
- Avoid areas with intermittent shade throughout the day.
- Consider using extension cables to place the solar panel in an optimal spot while positioning lights where desired.
Adjusting light modes for efficiency
- Many solar string lights offer multiple lighting modes (e.g., steady, flashing, fading).
- Choose energy-saving modes like slow fading or intermittent flashing to extend battery life.
- Reserve the brightest, continuous modes for special occasions to conserve energy.
Avoiding interference from other light sources
- Position solar panels away from strong artificial light sources like street lamps or porch lights.
- Be mindful of reflective surfaces that might confuse the light sensor.
- Consider using smart solar lights with programmable timers to ensure they operate only when needed.
Pro tip: Regularly rotate your string lights to ensure even wear on all bulbs and prevent permanent kinking of the wires.
8. DIY Repairs vs. Professional Help: When to Call in the Experts
While many solar string light issues can be resolved with a bit of DIY spirit, sometimes it’s best to seek professional assistance. Here’s how to know when to call in the pros:
Simple fixes you can do at home
- Battery replacements
- Basic cleaning and maintenance
- Tightening loose connections
- Replacing individual bulbs (if your model allows)
Signs that indicate professional repair is needed
- Electrical issues beyond basic connection problems
- Damage to the solar panel or controller circuitry
- Persistent problems that don’t respond to troubleshooting
- Any signs of internal water damage or electrical shorting
Choosing a reliable repair service
- Look for technicians specializing in solar or LED lighting systems.
- Check online reviews and ask for recommendations from friends or neighbors.
- Ensure the service offers a warranty on their repairs.
Remember: If your lights are still under warranty, contact the manufacturer before attempting any repairs that might void your coverage.
9. Preventing Future Issues: Maintenance Tips for Longevity
An ounce of prevention is worth a pound of cure, especially when it comes to solar string lights. Here are some maintenance tips to keep your lights shining bright for years to come:
Regular cleaning and inspection routines
- Clean solar panels and bulbs monthly, or more frequently in dusty areas.
- Inspect wires and connections seasonally for signs of wear or damage.
- Check battery compartments for any signs of corrosion or water ingress.
Proper storage during off-seasons
- If not using your lights year-round, store them in a cool, dry place.
- Remove batteries if storing for extended periods to prevent leakage.
- Coil wires loosely to prevent kinking or damage.
Upgrading to newer, more reliable models
- Stay informed about advancements in solar lighting technology.
- Consider upgrading every few years to benefit from improved efficiency and features.
- Look for models with better weatherproofing and longer-lasting components.
Pro tip: Keep a “solar light repair kit” handy with spare batteries, a small multimeter, and basic tools for quick fixes.

Conclusion: Let There Be (Solar) Light!
Congratulations! You now know how to deal with most solar string light problems that will be coming your way. You have gone from learning just the basics of how these environment-friendly illuminators work to how you can troubleshoot your units to keep your outdoor space aglow night in and night out.
A little preventive maintenance indeed goes a long way in keeping your solar lights shining bright for years. Cleaning regularly, positioning them rightly, and repairing them in time can make all the difference between a dim disappointment and a dazzling display.
Now, go ahead and put this new knowledge into practice. Whether you are planning a backyard barbecue, a romantic evening under the stars, or simply want to enjoy the soft ambiance of your garden, you can now do so with confidence. Don’t let technical hiccups dim your sparkle-you’re the master of your outdoor lighting domain!
Brighter nights and more brilliant outdoor spaces are a guarantee. May your solar string lights never dim less than the brightness of your spirit for the adventure in DIY!