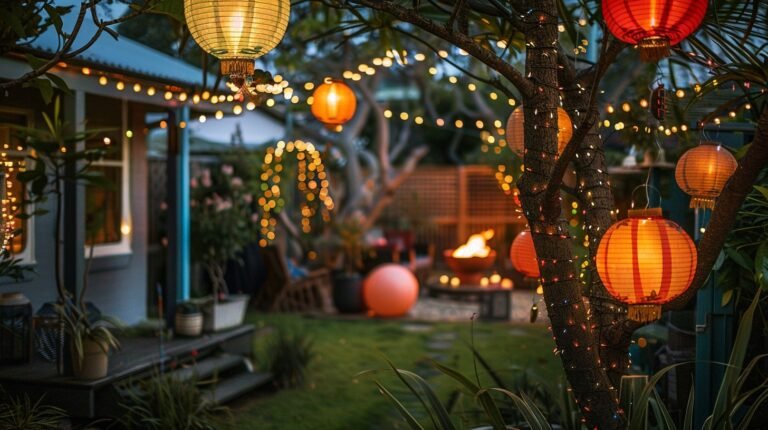
Have you ever stepped into a garden at night and felt like you’ve entered a magical realm? That’s the power of well-executed layered solar garden lighting. As an avid gardener and lighting enthusiast, I’m thrilled to share my insights on how you can transform your outdoor space into a captivating nighttime oasis.
This guide explores the art of creating depth in your garden using beautiful, sustainable layered solar lighting techniques.

Understanding Layered Solar Garden Lighting
Before we dive into the how-to, let’s clarify what we mean by layered solar garden lighting. Essentially, it’s an approach that combines different types of lighting at various heights and intensities to create a rich, multidimensional effect in your garden. The best part? We’re doing it all with the power of the sun!
Layered lighting typically involves three main components:
- Task lighting: Illuminating functional areas for safety and usability
- Accent lighting: Highlighting specific garden features or focal points
- Ambient lighting: Creating overall atmosphere and mood
By combining these layers thoughtfully, you’ll create a garden that’s not just lit, but alive with depth and character after the sun goes down.
Why Go Solar?
You might be wondering, “Why focus on solar-powered options?” Well, let me tell you, solar lighting has come a long way! Modern solar garden lights are more efficient, powerful, and versatile than ever before. By choosing solar, you’re not only reducing your energy bills but also minimizing your carbon footprint. It’s a win-win for your wallet and the planet!

Creating Your Layered Solar Lighting Plan
Now, to the most exciting part – planning your layered solar garden lighting! Here’s how we’ll approach it:
Step 1: Assess Your Garden
Start by taking a good look at your garden during the day. Identify the following:
- Pathways and steps that need illumination for safety
- Focal points like water features, sculptures, or prized plants
- Seating areas or gathering spaces
- Trees, shrubs, or architectural elements that could benefit from uplighting
Make a rough sketch of your garden, noting these key areas. This will serve as your lighting blueprint.
Step 2: Choose Your Solar Lights
Now that you know what you want to illuminate, it’s time to select your solar lights. Here are some options for each layer:
Task Lighting:
- Solar path lights for walkways
- Solar step lights for stairs
- Solar-powered security lights for entryways
Accent Lighting:
- Solar spotlights for highlighting garden features
- Solar uplight for trees and shrubs
- Solar-powered garden sculptures with built-in lights
Ambient Lighting:
- Solar string lights for overall soft illumination
- Solar lanterns for table-top or hanging options
- Solar-powered tiki torches for a warm, flickering effect
Remember, the key to creating depth is variety. Mix and match different types of lights to achieve a layered effect.
Step 3: Plan Your Layout
With your garden sketch and light selections in hand, start planning where each light will go. Here are some tips to create depth:
- Begin with task lighting: Ensure all necessary areas are safely lit.
- Add accent lighting: Use spotlights and uplights to draw the eye to focal points.
- Finish with ambient lighting: Fill in with softer, overall illumination.
Think about creating zones of light and shadow. You don’t want to illuminate every inch of your garden – the interplay of light and dark is what creates that magical atmosphere we’re after.
Step 4: Consider Height and Angles
To truly create depth, you need to think vertically as well as horizontally. Place lights at various heights:
- Ground-level path lights
- Mid-level spotlights on stakes
- High-hanging string lights or lanterns
Experiment with different angles too. Uplighting a tree creates a different effect than downlighting it from a branch.
Installation Tips
Now that you have your plan, it’s time to bring it to life! Here are some tips for installing your solar garden lights:
- Ensure optimal sunlight: Place solar panels in areas that receive plenty of direct sunlight during the day.
- Clean panels regularly: Dust and debris can reduce charging efficiency.
- Use quality stakes: For ground lights, invest in sturdy stakes that can withstand wind and weather.
- Hide wires: If your lights have separate solar panels, conceal any connecting wires for a cleaner look.
- Be flexible: Don’t be afraid to move lights around until you achieve the desired effect.

Creating Magical Effects
Want to take your layered solar garden lighting to the next level? Try these creative ideas:
- Moonlight effect: Use cool-toned lights high in trees to mimic natural moonlight filtering through branches.
- Silhouettes: Place lights behind plants or structures to create dramatic shadows and silhouettes.
- Reflected light: If you have a pond or water feature, use lights to create shimmering reflections on the water’s surface.
- Color-changing lights: Some solar lights offer color-changing options. Use these sparingly for a whimsical touch.
Maintaining Your Solar Lights
To keep your layered solar garden lighting looking its best:
- Clean solar panels and light fixtures regularly
- Replace batteries in solar units every 1-2 years
- Prune plants around solar lights to prevent shading
- Check for water damage or insects in light fixtures
- Adjust light positions seasonally to account for changing sun patterns
Troubleshooting Common Issues
Even with the best planning, you might encounter some challenges. Here are solutions to common problems:
- Dim lights: Check for obstructions to the solar panel, clean the panel, or consider replacing batteries.
- Lights not turning on: Ensure the switch is in the ‘on’ position and that the light sensor isn’t being triggered by nearby light sources.
- Short runtime: Your lights might need more direct sunlight during the day. Try relocating them to a sunnier spot.
Conculsion| Embracing the Night Garden
As you implement your layered solar garden lighting plan, take time to enjoy the process. Sit in your garden at different times of night, observing how the light changes and moves. You’ll start to see your outdoor space in a whole new way.
Remember, creating depth in your garden lighting is an art as much as a science. Don’t be afraid to experiment, adjust, and play with different effects. Your garden is unique, and your lighting should reflect your personal style and the specific features of your space.
By layering your solar garden lighting thoughtfully, you’re not just illuminating your outdoor area – you’re creating an enchanting nighttime environment that extends your living space and allows you to enjoy your garden long after the sun has set. So go ahead, let your creativity shine, and watch as your garden transforms into a mesmerizing nocturnal wonderland!


